How to Fix Slow macOS Sequoia on VMware Workstation (Windows Host)?
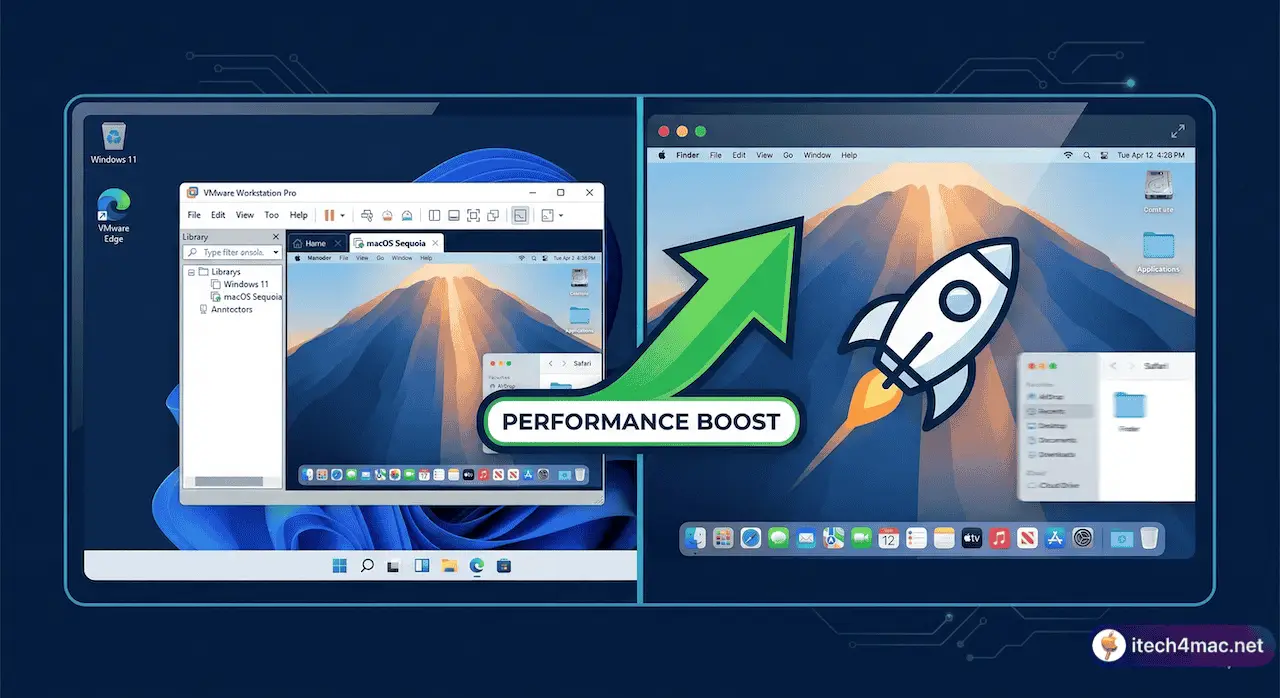
- Slow macOS Sequoia on VMware is almost always caused by wrong resource allocation, missing VMware Tools, or disabled hardware acceleration.
- Allocate at least 4 CPU cores and 8GB RAM to the VM — ideally half your host machine’s resources.
- Install VMware Tools inside macOS immediately after installation — this alone fixes most lag issues.
- Enable 3D acceleration and set VRAM to 128MB or higher for smooth UI rendering.
- Pre-allocate your virtual disk and store it on an SSD — never on an HDD.
- A handful of
.vmxfile tweaks can dramatically boost performance beyond the GUI settings. - Disable macOS visual effects inside the VM — they consume GPU resources VMware can barely spare.
You installed macOS Sequoia on VMware Workstation, followed every guide step by step — and now you’re staring at a painfully slow virtual machine that stutters on basic tasks, takes forever to open apps, and makes the dock animations look like a slideshow. Sound familiar?
The good news: this is almost never a hardware problem. In the vast majority of cases, a slow macOS Sequoia VM on VMware is caused by a small set of fixable configuration mistakes — and once you address them systematically, the performance difference is night and day.
This guide covers every meaningful fix, from the obvious (RAM allocation) to the obscure (.vmx file tweaks that VMware’s GUI doesn’t expose). If you haven’t installed macOS Sequoia on VMware yet, check our step-by-step installation guide first, then come back here to optimize it.
Why Is macOS Sequoia Slow on VMware? The Root Causes
Before jumping into fixes, it helps to understand why macOS tends to run slower on VMware than other guest operating systems like Windows or Linux. There are three fundamental reasons:
macOS Wasn’t Designed for x86 VMs
macOS is optimized for Apple Silicon and specific Intel hardware. Running it in a generic x86 VM means the OS constantly works against the virtualized environment.
GPU Virtualization is Limited
VMware’s 3D acceleration for macOS guests is far less capable than for Windows guests. macOS Sequoia’s Metal-based UI demands real GPU work that VMware struggles to provide.
Default Settings are Conservative
VMware’s default VM settings allocate minimal resources. Left unchanged, macOS gets starved of CPU, RAM, and VRAM — causing everything to crawl.
With that context, let’s go through every fix in order of impact — start from the top and work your way down.
Fix 1: Install VMware Tools (Most Important Step)
If you haven’t installed VMware Tools inside your macOS Sequoia VM, stop everything and do this first. VMware Tools is a package of drivers and utilities that enables proper communication between the host and guest OS — without it, macOS is running completely blind to the underlying hardware capabilities.
Without VMware Tools: no proper display driver, no dynamic screen resolution, no clipboard sharing, and most critically — no hardware acceleration. This single missing package is responsible for the majority of severe lag complaints.
-
1With your macOS Sequoia VM running, go to the VMware menu bar and click VM → Install VMware Tools.
VM → Install VMware Tools -
2Inside macOS, a disk image called VMware Tools will mount on the desktop. Double-click it to open.
-
3Double-click Install VMware Tools and follow the installer. You’ll need your macOS password.
-
4macOS may prompt you to allow the VMware kernel extension. Go to System Settings → Privacy & Security and click Allow next to the VMware software notice.
System Settings → Privacy & Security → Allow -
5Restart the VM when prompted. After reboot, the display should immediately feel sharper and more responsive.
macOS Sequoia may block the VMware kernel extension on first install due to System Integrity Protection. If you don’t see the Allow button in Privacy & Security, shut down the VM, boot into macOS Recovery (hold Cmd+R on startup), open Terminal and run csrutil disable, then reboot and try the install again.
Fix 2: Allocate Enough CPU Cores and RAM
VMware’s default allocation is dangerously conservative for macOS Sequoia. The default 2 CPU cores and 4GB RAM settings will result in constant beachballing. macOS Sequoia itself requires these resources just to run its background processes — before you open a single app.
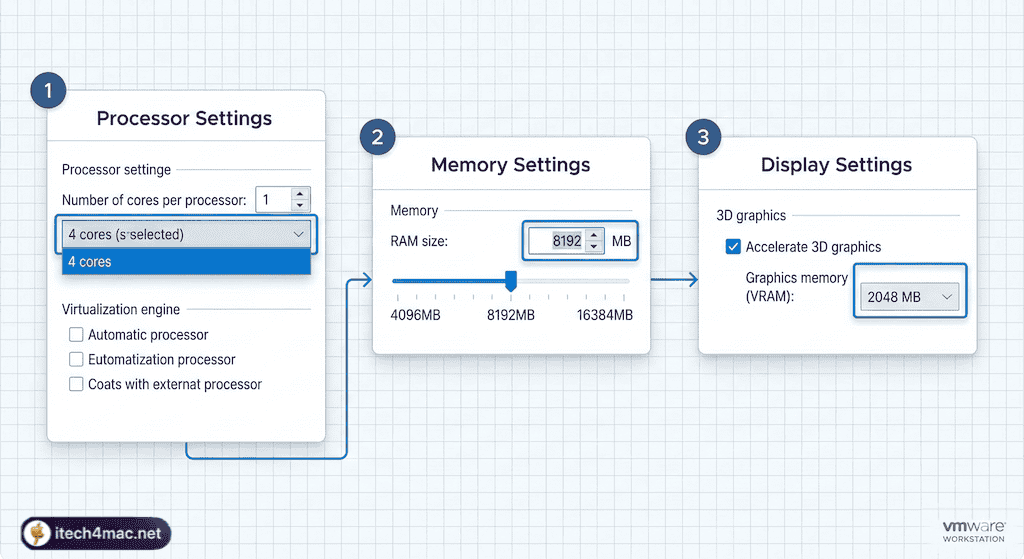
VMware VM Settings → Processors and Memory — the most impactful settings for macOS performance
-
1Shut down the macOS VM completely (not suspend).
-
2Right-click the VM in the library and select Settings.
Right-click VM → Settings -
3Click Processors. Set the number of processors to 1 and cores per processor to 4 (or 2 processors × 2 cores). Total: 4 cores minimum, 6–8 if your CPU has them to spare.
Settings → Processors → Cores: 4 -
4Click Memory. Set RAM to 8192 MB (8GB) minimum. If your host has 32GB, give the VM 12–16GB for the best experience.
Settings → Memory → 8192 MB -
5Click OK and start the VM. The boot time and overall responsiveness improvement will be immediately noticeable.
The 50% rule: Never allocate more than half your host machine’s physical CPU cores or RAM to a single VM. Doing so starves Windows (your host OS) and causes both systems to slow down simultaneously. If your host has 8 cores and 16GB RAM, give the VM 4 cores and 6–8GB.
Fix 3: Enable 3D Acceleration and Increase VRAM
macOS Sequoia uses Metal for all UI rendering — the dock, animations, transparency effects, and window management all rely on GPU acceleration. Without 3D acceleration enabled in VMware, the CPU has to handle all of this rendering work instead, which is why the interface feels sluggish and laggy even when the CPU meter isn’t maxed out.
-
1With the VM shut down, open VM Settings → Display.
Settings → Display -
2Check the box for “Accelerate 3D graphics”.
-
3Set Graphics memory to 2048 MB (2GB). At minimum use 128MB — the default 256MB is often not enough for Sequoia’s display rendering.
Graphics memory: 2048 MB -
4Also check “Use full resolution for Retina display” if it appears — this helps on high-DPI host monitors.
-
5Click OK and start the VM. Dock animations and window transitions should be visibly smoother.
Fix 4: Fix Your Virtual Disk Setup
Disk I/O is one of the most overlooked performance bottlenecks in VMware macOS setups. Two things dramatically impact disk speed: the disk allocation type and the physical drive it lives on.
| Setting | Performance Impact | Recommendation |
|---|---|---|
| Dynamically allocated disk | ❌ Slow — grows on demand, causes fragmentation | Avoid for macOS VMs |
| Pre-allocated (thick) disk | ✅ Fast — full space reserved upfront | Always use this for macOS |
| VM stored on HDD | ❌ Very slow — rotational latency kills VM performance | Never store macOS VM on HDD |
| VM stored on SATA SSD | 🟡 Good — significant improvement over HDD | Acceptable minimum |
| VM stored on NVMe SSD | ✅ Best — fastest disk I/O possible | Ideal choice |
| SATA virtual disk controller | 🟡 Good — default, works well | Fine for most setups |
| NVMe virtual disk controller | ✅ Faster — lower overhead | Use if available in your VMware version |
To convert a dynamic disk to pre-allocated: go to VM Settings → Hard Disk → Utilities → Compact/Defragment, then use VMware’s Disk Manager or recreate the VM with pre-allocation selected. Note: this requires enough free space on your host drive equal to the full VM disk size.
Fix 5: Advanced .vmx File Tweaks
VMware’s graphical settings panel only exposes a fraction of the available configuration options. The real power is in the .vmx file — a plain text configuration file for your VM. Adding a few lines here can make a substantial difference in macOS Sequoia performance.
-
1Shut down the VM completely before editing.
-
2In VMware, right-click the VM → Open VM Directory. This opens the folder where the VM files are stored.
Right-click VM → Open VM Directory -
3Find the file ending in .vmx (e.g.
macOS Sequoia.vmx). Right-click → Open with Notepad. -
4Scroll to the bottom and add the lines shown below. Save the file and close Notepad.
-
5Start the VM. If it fails to boot, reopen the .vmx file and remove the last line you added — some tweaks are hardware-dependent.
Add these lines to the bottom of your .vmx file:
ulm.disableMitigations = “TRUE”
// Enable faster memory access
MemTrimRate = “0”
MemAllowAutoScaleDown = “FALSE”
sched.mem.pshare.enable = “FALSE”
// Improve disk I/O performance
mainMem.useNamedFile = “FALSE”
disk.DemandCreationDelay = “0”
// Improve CPU scheduling for macOS guest
vcpu.hotadd = “FALSE”
cpuid.coresPerSocket = “4”
// Boost display/graphics performance
svga.vramSize = “268435456”
vhv.enable = “TRUE”
About ulm.disableMitigations = "TRUE": This disables Spectre/Meltdown side-channel protections inside the VM. It is safe to use on a personal machine where you control what runs in the VM. Do not use this on shared or enterprise machines. The performance gain on Windows hosts is significant — often 15–30% CPU improvement.
Fix 6: Optimize macOS Sequoia Settings Inside the VM
Even with VMware perfectly configured, macOS Sequoia’s default visual settings are tuned for hardware-accelerated Apple Silicon — not a virtualized x86 environment. Turning off these effects costs you nothing functionally and can dramatically improve perceived performance.
-
1Reduce Motion: Go to System Settings → Accessibility → Display and enable “Reduce Motion”. This eliminates the zoom animations when opening/closing apps — one of the biggest GPU consumers.
System Settings → Accessibility → Display → Reduce Motion: ON -
2Reduce Transparency: In the same menu, enable “Reduce Transparency”. This replaces the blurred glass effect on the menu bar and dock with solid colors — saving significant GPU overhead.
System Settings → Accessibility → Display → Reduce Transparency: ON -
3Disable Spotlight Indexing: Go to System Settings → Siri & Spotlight and uncheck all categories under Search Results. Spotlight indexing runs in the background and hammers disk I/O on a freshly installed VM.
System Settings → Siri & Spotlight → Uncheck all -
4Turn off automatic updates: Go to System Settings → General → Software Update and disable “Automatic Updates”. Background update checks compete for your VM’s limited bandwidth and disk I/O.
System Settings → General → Software Update → Automatic: OFF -
5Disable Time Machine: If Time Machine is enabled, it will try to back up and fail repeatedly inside a VM, consuming resources. Turn it off at System Settings → General → Time Machine.
System Settings → General → Time Machine: OFF -
6Set Energy to High Performance: Go to System Settings → Battery (if present) or Energy Saver and set the profile to prevent throttling inside the VM.
Fix 7: Optimize the Windows Host Side
VMware performance is a two-way street. If your Windows host is under pressure, your macOS VM will suffer regardless of how well it’s configured. Here are the host-side actions that matter most.
-
1Set VMware to High Performance power plan: In Windows, open Power Options and switch to High Performance or Ultimate Performance while using VMware. Balanced mode throttles CPU clock speeds, directly impacting VM performance.
Control Panel → Power Options → High Performance -
2Close unnecessary apps on the host: Browsers, Discord, game launchers, and Electron apps eat RAM and CPU that your VM needs. Close anything you don’t need while running macOS.
-
3Disable Windows Defender real-time scanning for the VM folder: Windows Defender scanning every write to the .vmdk file in real time causes significant disk I/O overhead. Add the VM directory as an exclusion in Windows Security.
Windows Security → Virus & Threat Protection → Exclusions → Add VM folder -
4Ensure Hyper-V is disabled: Hyper-V and VMware Workstation conflict at the hypervisor level. If Hyper-V is active, VMware loses hardware virtualization access. Check via Turn Windows Features On or Off and uncheck Hyper-V.
Windows Features → Hyper-V → Unchecked -
5Keep VMware Workstation updated: Each major version brings performance improvements for macOS guests. VMware Workstation Pro 17+ has notably better macOS Sequoia compatibility than older versions.
WSL 2 (Windows Subsystem for Linux) also uses Hyper-V. If you have WSL 2 running, it activates the Hyper-V hypervisor platform which limits VMware to running in a lower-performance mode. Either use WSL 1 or accept the performance compromise while both run simultaneously.
Performance Impact Summary: All Fixes at a Glance
| Fix | Difficulty | Performance Impact | Do It First? |
|---|---|---|---|
| Install VMware Tools | Easy | 🔥 Highest | ✅ Yes — #1 priority |
| Increase CPU cores to 4+ | Easy | ✅ Very High | ✅ Yes |
| Increase RAM to 8GB+ | Easy | ✅ Very High | ✅ Yes |
| Enable 3D acceleration + VRAM | Easy | ✅ High | ✅ Yes |
| Move VM to NVMe SSD | Medium | ✅ High | 🟡 If on HDD |
| .vmx file tweaks | Medium | 🟡 Medium–High | 🟡 After basics |
| Disable macOS visual effects | Easy | 🟡 Medium | 🟡 After basics |
| Disable Windows Defender exclusion | Easy | 🟡 Medium | 🟡 Recommended |
| Disable Hyper-V | Medium | ✅ High (if enabled) | 🟡 Check first |
| High Performance power plan | Easy | 🟡 Low–Medium | 🟡 Quick win |
Apply the first four fixes (VMware Tools, CPU, RAM, 3D acceleration) before anything else. In most cases, these four changes alone transform a barely usable VM into a smooth, workable macOS environment. The rest are refinements.
Frequently Asked Questions
How much RAM should I give macOS Sequoia in VMware?
8GB is the practical minimum for a usable experience. macOS Sequoia uses roughly 4–5GB just for system processes, leaving very little for apps at 4GB. If your host machine has 16GB, give the VM 8GB. With 32GB on the host, 12–16GB makes macOS feel almost native. Never exceed 50% of your host RAM to keep Windows stable.
How many CPU cores should I allocate to the VM?
4 cores is the sweet spot for most setups. 2 cores will cause noticeable lag under any real workload. If your host CPU has 12 or more cores, allocating 6 to the VM gives excellent results. Use 1 processor with multiple cores per processor rather than multiple processors — macOS handles single-processor multi-core configurations better in a virtualized environment.
Will running macOS on VMware damage my Windows installation?
No. VMware isolates the guest OS completely from your host. Your Windows installation, files, and settings are unaffected by what happens inside the VM. The only risk is if you allocate too much RAM or CPU and starve Windows — which you avoid by following the 50% rule.
Is it legal to run macOS on VMware on a Windows PC?
Apple’s macOS license technically restricts installation to Apple hardware. Running macOS on non-Apple hardware in a VM violates Apple’s End User License Agreement (EULA). That said, this is widely done for personal development, testing, and learning purposes. It is your responsibility to understand and comply with the license terms in your jurisdiction.
My VM was fast before and suddenly became slow — what happened?
Several things cause a previously fast VM to slow down: (1) A macOS software update reset some settings or installed a conflicting kernel extension. (2) Your VM’s dynamic disk became highly fragmented. (3) Windows installed a major update that re-enabled Hyper-V. (4) A Windows Defender update started scanning the VM folder more aggressively. Check each of these in order.
Should I use VMware Workstation Pro or Player for macOS?
VMware Workstation Pro offers more configuration options that are useful for macOS performance tuning — specifically around processor scheduling, advanced memory settings, and better snapshot management. VMware Workstation Player works but has fewer exposed settings. VMware Workstation Pro is now free for personal use as of 2024, so there’s no reason not to use it.
Does the host CPU matter for macOS VM performance?
Significantly. A modern Intel Core i7/i9 or AMD Ryzen 7/9 with high single-core clock speeds will run the macOS VM noticeably better than older or budget CPUs. Single-core performance matters more than core count for macOS tasks. Also, CPUs with VT-x (Intel) or AMD-V (AMD) hardware virtualization support are essential — verify this is enabled in your BIOS/UEFI settings.
Can I use macOS Sequoia on VMware for App development?
Yes, with the optimizations in this guide, Xcode and basic iOS/macOS app development is workable on VMware. You won’t get simulator GPU acceleration, and Xcode builds will be slower than on real hardware, but for learning, prototyping, and non-GPU-intensive development it is practical. For serious production development, real Apple hardware remains the right choice.
The Bottom Line
A slow macOS Sequoia VM on VMware is almost always a configuration problem, not a hardware limitation. The combination of VMware Tools installation, proper CPU and RAM allocation, 3D acceleration, an SSD-based disk, and a few .vmx tweaks transforms the experience from frustrating to genuinely usable.
Work through the fixes in the order presented — most users find that the first three or four changes deliver 80% of the total improvement. The advanced tweaks and host-side optimizations take you the rest of the way.
If you’re still building out your VMware macOS setup, check our guides on installing macOS Sequoia in VMware and downloading macOS Sequoia on a Windows laptop for the complete setup workflow.
Got it working smoothly? Drop a comment with your host specs and which fix made the biggest difference — it helps other readers know where to focus first. Follow itech4mac’s Virtual Machines section for more guides.