What Is Homebrew on macOS? How to Use It and Why with examples?
If you’re a Mac user looking to simplify installing and managing software, Homebrew is a game-changer. It’s a free, open-source package manager that makes it easy to install apps, tools, and libraries right from your terminal.
In this guide, we’ll break down what Homebrew is, why you should use it, how to set it up, and share some practical examples to get you started. Let’s dive in!
What Is Homebrew on macOS?
Homebrew is a package manager for macOS (and Linux) that lets you install, update, and manage software using simple terminal commands. Think of it as a one-stop shop for downloading tools that don’t come with macOS by default—like programming languages, command-line utilities, or even graphical apps. It’s often called “the missing package manager for macOS” because it fills a gap Apple doesn’t address natively.
Why Use Homebrew?
Here’s why Homebrew is a must-have for Mac users:
- Saves time: Install software with one command instead of hunting for downloads online.
- Keeps things updated: Easily update all your tools in one go.
- Access to more tools: Get software that’s not available on the Mac App Store, like developer tools or open-source apps.
- Customizable: Install specific versions of software or tweak settings as needed.
- Community-driven: Homebrew has a massive library of “formulas” (packages) maintained by a global community.
Whether you’re a developer, a power user, or just someone who wants to streamline software management, Homebrew makes life easier.
How to Install and Use Homebrew on macOS
Let’s get Homebrew set up on your Mac and show you how to use it.
Step 1: Install Homebrew
- Open the Terminal app on your Mac (find it in Applications > Utilities).
- Paste this command and press Enter:
/bin/bash -c "$(curl -fsSL https://raw.githubusercontent.com/Homebrew/install/HEAD/install.sh)" - Follow the on-screen prompts. You might need to enter your Mac’s password, and it’ll install Xcode Command Line Tools if you don’t already have them.
- Once it’s done, Homebrew will be installed. You’ll see a confirmation message with next steps (like adding Homebrew to your PATH if needed).
Step 2: Verify the Installation
- Run this command to check that Homebrew is working:
brew --version - You should see something like “Homebrew 4.x.x” (the version number might vary).
Step 3: Start Using Homebrew Commands
Here are the basic commands to get you going:
- Install a package: brew install <package-name>
- Update Homebrew: brew update (keeps Homebrew itself up to date)
- Upgrade packages: brew upgrade (updates all installed packages)
- Search for a package: brew search <keyword>
- Uninstall a package: brew uninstall <package-name>
Examples of Helpful Homebrew Usage
Now that Homebrew is set up, let’s look at some practical ways to use it.
Example 1: Install a Code Editor (Visual Studio Code)
Want a popular code editor? Homebrew can install Visual Studio Code in seconds.
- Run:
brew install --cask visual-studio-code - The –cask flag is for graphical apps. Once it’s done, you’ll find VS Code in your Applications folder, ready to use.
Example 2: Install a Command-Line Tool (wget)
Need a tool to download files from the web? wget is a handy utility.
- Run:
brew install wget - Now you can use wget in the terminal, like: wget https://example.com/file.zip.
Example 3: Install a Programming Language (Python)
If you’re a developer, Homebrew makes it easy to install languages like Python.
- Run:
brew install python - This installs the latest Python version. Check it with python3 –version. You can now start coding in Python right away.
Example 4: Keep Everything Updated
To update all your Homebrew-installed software:
- Run:
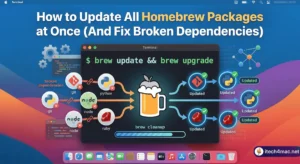
brew update && brew upgrade - This ensures Homebrew and all your packages are up to date with the latest versions.
Example 5: Install a Web Browser (Firefox)
Prefer Firefox over Safari? Homebrew can install it with ease.
- Run:
brew install --cask firefox - After installation, find Firefox in your Applications folder and set it as your default browser if you like.
Example 6: Install a Database (MySQL)
Need a database for a project? Homebrew can set up MySQL quickly.
- Run:
brew install mysql - Start it with mysql.server start and use it for managing data or testing web apps.
Example 7: Install a Version Control Tool (Git)
For developers, Git is essential for version control. Homebrew simplifies the install.
- Run:
brew install git - Check it with git –version, then start managing your code repositories.
Example 8: Install a Media Tool (FFmpeg)
Want to edit or convert video/audio files? FFmpeg is a powerful tool.
- Run:
brew install ffmpeg - Use it to trim videos or convert formats, like ffmpeg -i input.mp4 output.avi.
Example 9: Install a Task Runner (Node.js)
For web development, Node.js is a must. Homebrew handles it effortlessly.
- Run:
brew install node - Verify with node -v, then use it to run JavaScript projects or install npm packages.
Bonus Tips for Using Homebrew
- Explore packages: Use brew search to find new tools. For example, brew search git will show Git-related packages.
- Install GUI apps: Homebrew Cask lets you install apps like Firefox or Spotify with the –cask flag.
- Clean up: Run brew cleanup to remove old versions of packages and free up space.
Frequently Asked Questions
Q: Is Homebrew safe to use on macOS?
A: Yes, Homebrew is widely used and maintained by a trusted community. Just be cautious about what packages you install, and always download Homebrew from its official site.
Q: Can I use Homebrew on M-series Macs?
A: Absolutely! Homebrew works on both Intel and M-series Macs (M1, M2, M3). The installer automatically adjusts for your Mac’s architecture.
Q: Do I need to be a developer to use Homebrew?
A: Not at all! While developers love Homebrew for tools like Git or Node.js, anyone can use it to install apps or utilities with ease.
Homebrew is a powerful tool that simplifies software management on macOS. From installing apps like Visual Studio Code to command-line tools like wget or programming languages like Python, Homebrew saves you time and effort. With just a few terminal commands, you can unlock a world of software that’s not easily accessible otherwise. Give it a try, and you’ll wonder how you ever managed without it!
Got questions about Homebrew or other Mac tools? Drop them in the comments—we’d love to help!