How to Update All Homebrew Packages at Once (And Fix Broken Dependencies)
Running brew upgrade should be a 30-second routine. But sometimes it pulls in unexpected packages, breaks dependencies, or throws cryptic errors. This guide covers the complete update workflow and every common dependency problem — with commands to fix each one.
The Safe Homebrew Update Routine
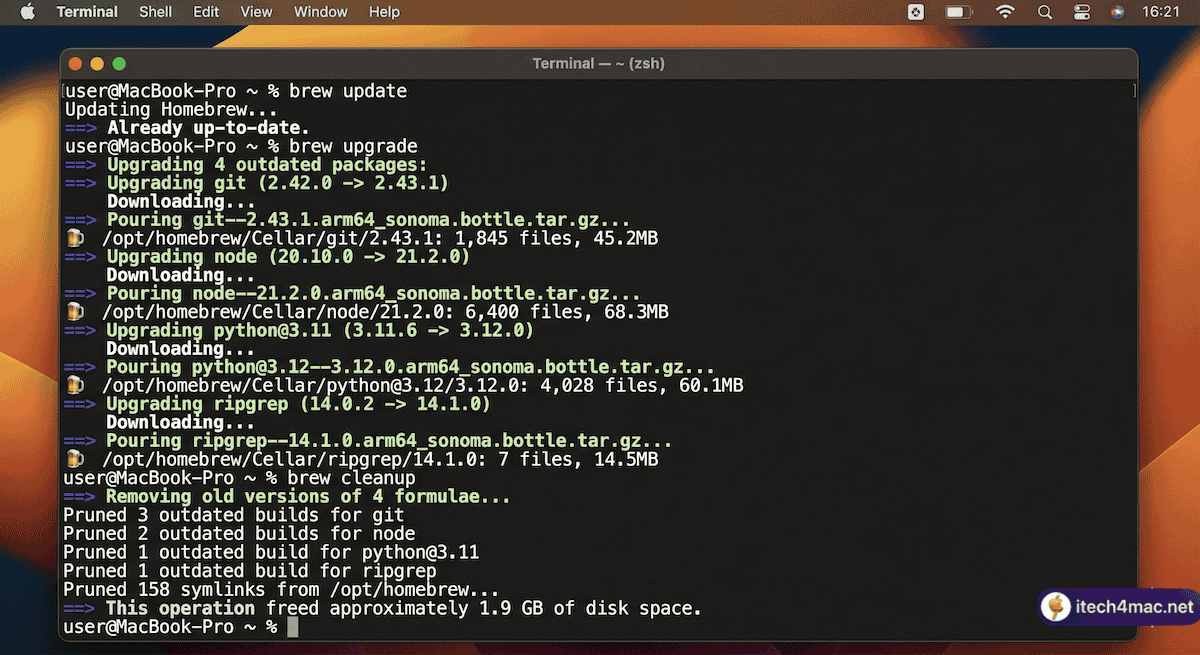
Run this sequence in order. Each command plays a specific role:
brew update           # Fetch latest formula information from GitHub
brew outdated         # Preview what will be upgraded (optional but useful)
brew upgrade          # Upgrade all outdated formulae and casks
brew autoremove       # Remove unused dependency packages
brew cleanup --prune=all  # Delete old versions and cached downloads
brew doctor           # Check for configuration problems
Running brew update before brew upgrade is technically redundant in modern Homebrew (upgrade calls update automatically), but it is a useful habit for seeing what has changed first.
Why Does brew upgrade Install So Many Unexpected Packages?
This surprises many users. When you upgrade one package, Homebrew must also upgrade all of its dependencies — and sometimes those dependencies have their own dependencies. Installing Node.js, for example, can trigger 58 additional packages. This is by design: Homebrew does not support mixing versions of packages in the same installation, so everything must move to the latest version together.
To see what dependencies a package will bring in before installing:
brew deps --tree node
Fixing the Most Common Homebrew Errors
Error 1: “Permission denied” on /opt/homebrew or /usr/local
This often happens after a macOS upgrade. Fix ownership:
# Apple Silicon
sudo chown -R $(whoami):admin /opt/homebrew
chmod -R u+rwX /opt/homebrew

# Intel Mac
sudo chown -R $(whoami):admin /usr/local/Homebrew
Error 2: “brew command not found” after macOS upgrade
macOS upgrades can reset PATH. Add Homebrew back to your shell profile:
# Apple Silicon — add to ~/.zshrc
echo 'eval "$(/opt/homebrew/bin/brew shellenv)"' >> ~/.zshrc
source ~/.zshrc

# Intel Mac — add to ~/.zshrc
echo 'eval "$(/usr/local/bin/brew shellenv)"' >> ~/.zshrc
source ~/.zshrc
For more detailed macOS-upgrade-specific fixes, see our existing article: Fixing Homebrew Issues After macOS Upgrades.
Error 3: Broken symlinks
brew doctor
brew link --overwrite [package-name]
Error 4: Corrupted Git repositories
If brew update fails with Git errors, reset the repositories:
cd $(brew --repo)
git fetch origin
git reset --hard origin/master
Error 5: Missing dependencies after uninstalling a package
brew missing        # Lists packages with missing dependencies
brew reinstall [package-name]  # Reinstall a specific package cleanly
Error 6: “Error: Cannot install in Homebrew on ARM processor” after macOS update
This indicates a Rosetta vs native architecture mismatch. Ensure you are running a native ARM Terminal (not Rosetta-emulated) on Apple Silicon:
arch # Should show "arm64" on Apple Silicon, not "i386"
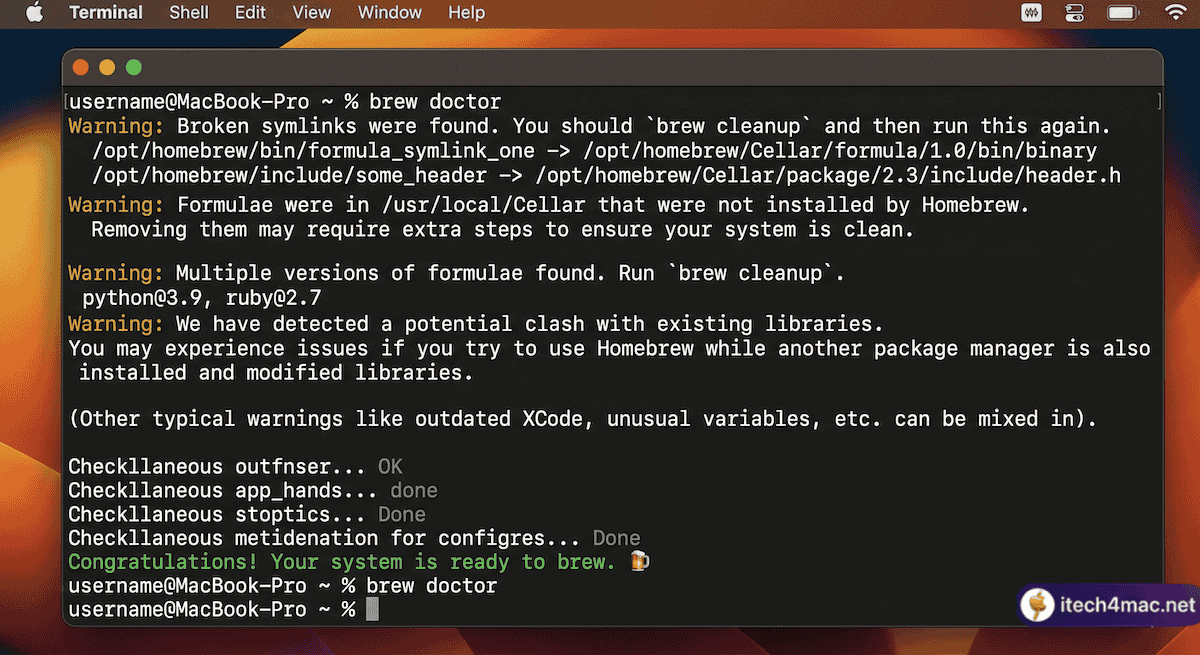
brew doctor diagnoses configuration problems and suggests specific fixesHow to Upgrade Only One Package Without Cascading
brew upgrade [package-name]
Note: Homebrew will still upgrade dependencies of that package if they are outdated, but it will not touch unrelated packages. This is safer than a blanket brew upgrade when you are in the middle of a project.
How to Completely Reinstall Homebrew (Last Resort)
If nothing else works, save your package list and do a clean reinstall:
brew bundle dump --file=~/Brewfile    # Save your package list
# Then uninstall Homebrew using the official script from https://github.com/Homebrew/install
# Then reinstall Homebrew
brew bundle install --file=~/Brewfile  # Restore all packages