Fixing Homebrew Issues After macOS Upgrades: A Comprehensive Guide
Upgrading to a new macOS version, such as macOS 26.0.0, can bring exciting features but also unexpected challenges for developers and power users who rely on Homebrew, the popular package manager for macOS. Many users report issues like the brew command not being recognized, Homebrew installations being wiped out, or Homebrew suddenly failing to work after an upgrade. Common error messages include:
- “It looks like the brew command is not in PATH.”
- “macOS 26.0.0 wiped out Homebrew, relocated a bunch of apps.”
- “homebrew suddenly fails to work.”
This SEO-optimized guide will walk you through the causes of these issues, provide step-by-step solutions to fix Homebrew after a macOS upgrade, and offer tips to prevent future problems. Whether you’re a seasoned developer or a casual user, this article will help you get Homebrew back on track.

Why Does Homebrew Break After macOS Upgrades?
Homebrew issues often arise after a macOS upgrade due to changes in the operating system’s environment, file system, or security settings. Here are the most common reasons:
- PATH Misconfiguration: macOS upgrades can reset or modify the system’s PATH environment variable, causing the brew command to become unrecognized.
- Relocation of Homebrew Files: Major macOS updates may alter the file system, moving or deleting Homebrew’s installation directory (typically /usr/local/Homebrew or /opt/homebrew for Apple Silicon).
- Permissions Issues: macOS’s stricter security policies, such as System Integrity Protection (SIP), can restrict access to Homebrew’s directories or executables.
- Version Incompatibility: Some Homebrew packages or the Homebrew core itself may not yet be fully compatible with the latest macOS version, leading to failures.
- Xcode Command Line Tools Issues: Homebrew relies on Xcode Command Line Tools, which may need updating or reinstallation after an OS upgrade.
Understanding these causes is the first step to resolving Homebrew problems. Let’s dive into the solutions.
How to Fix Homebrew Issues After a macOS Upgrade
Follow these step-by-step solutions to restore Homebrew functionality. Start with the simplest fixes and progress to more involved steps if needed.
1. Verify Homebrew Installation
First, check if Homebrew is still installed on your system.
- Open Terminal and run:
brew --version - If you see a version number (e.g., Homebrew 4.3.x), Homebrew is installed but may not be in your PATH. Proceed to Step 2.
- If you get a “command not found” error, Homebrew may have been removed or relocated. Skip to Step 3 to reinstall.
2. Fix the brew Command Not in PATH
If the brew command is not recognized, it’s likely missing from your PATH environment variable. To fix this:
- Check your shell: Determine whether you’re using bash, zsh, or another shell by running:
echo $SHELL - Update your shell configuration:
- For zsh (default on macOS Catalina and later):
echo 'eval "$(/opt/homebrew/bin/brew shellenv)"' >> ~/.zshrc source ~/.zshrc - For bash:
echo 'eval "$(/usr/local/Homebrew/bin/brew shellenv)"' >> ~/.bash_profile source ~/.bash_profile
- For zsh (default on macOS Catalina and later):
- Verify the fix: Run brew –version again. If it works, you’re set! If not, proceed to the next step.
Note: On Apple Silicon Macs, Homebrew installs to /opt/homebrew. On Intel Macs, it’s typically /usr/local/Homebrew.
3. Reinstall Homebrew
If Homebrew is missing or corrupted, reinstalling it is often the quickest fix.
- Uninstall Homebrew (if partially present):
/bin/bash -c "$(curl -fsSL https://raw.githubusercontent.com/Homebrew/install/HEAD/uninstall.sh)" - Reinstall Homebrew:
/bin/bash -c "$(curl -fsSL https://raw.githubusercontent.com/Homebrew/install/HEAD/install.sh)" - After installation, follow the on-screen instructions to add Homebrew to your PATH (similar to Step 2).
- Verify installation:
brew doctorThis command checks for issues and provides recommendations. Address any warnings before proceeding.
4. Update Xcode Command Line Tools
Homebrew depends on Xcode Command Line Tools for compiling software. macOS upgrades can break or outdated these tools.
- Check the current version:
xcode-select --version - Update or reinstall:
sudo rm -rf /Library/Developer/CommandLineTools xcode-select --install - Follow the prompts to install the tools, then run:
brew doctorto ensure Homebrew recognizes the updated tools.
5. Update Homebrew and Packages
If Homebrew is installed but fails to work, it may need updating to be compatible with the new macOS version.
- Update Homebrew:
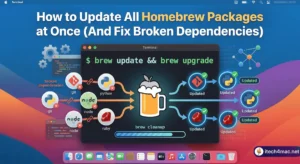
brew update - Upgrade installed packages:
brew upgrade - Clean up broken dependencies:
brew cleanup
6. Address Permissions Issues
macOS’s security features can restrict Homebrew’s access to certain directories.
- Check permissions:
ls -ld /opt/homebrewEnsure your user account has read/write/execute permissions. - Fix permissions (Apple Silicon example):
sudo chown -R $(whoami):admin /opt/homebrew chmod -R u+rwX /opt/homebrew - For Intel Macs, replace /opt/homebrew with /usr/local/Homebrew.
7. Check for macOS-Specific Issues
If the above steps don’t resolve the issue, check Homebrew’s GitHub issues page or run:
brew doctorThis may highlight macOS-specific problems, such as compatibility issues with macOS 26.0.0. Search for solutions on Homebrew’s official documentation or forums.
Preventing Homebrew Issues in Future macOS Upgrades
To minimize disruptions after future macOS upgrades, follow these best practices:
- Backup Homebrew Packages: Before upgrading macOS, list your installed packages:
brew list > brew_packages.txtAfter the upgrade, reinstall them if needed:xargs brew install < brew_packages.txt - Update Homebrew Regularly: Keep Homebrew and its packages up to date to ensure compatibility:
brew update && brew upgrade - Monitor macOS Beta Releases: If you use macOS beta versions, check Homebrew’s GitHub for known issues before upgrading.
- Use a Version Manager: Tools like asdf or nvm can manage package versions alongside Homebrew, reducing conflicts.
- Document Your Setup: Maintain a record of your Homebrew configuration and shell settings to quickly restore them after upgrades.
Troubleshooting Persistent Issues
If Homebrew still doesn’t work, try these advanced steps:
- Check for System Integrity Protection (SIP): macOS’s SIP can block Homebrew in rare cases. Verify SIP status:
csrutil statusDisabling SIP is not recommended unless absolutely necessary and requires booting into Recovery Mode. - Reinstall macOS Command Line Tools: If brew doctor reports issues with Xcode tools, reinstall them as shown in Step 4.
- Seek Community Help: Visit Homebrew’s GitHub Discussions or Stack Overflow for community-driven solutions specific to macOS 26.0.0.
finally
Homebrew is an essential tool for macOS users, but macOS upgrades can disrupt its functionality, leading to errors like the brew command not being found or installations being wiped out. By following this guide—verifying the installation, fixing the PATH, reinstalling Homebrew, updating Xcode tools, and addressing permissions—you can resolve most issues. Implementing preventive measures, like backing up packages and keeping Homebrew updated, will save you time in the future.
If you’re still facing problems, don’t hesitate to check Homebrew’s official resources or community forums for the latest advice. With these steps, you’ll have Homebrew running smoothly on macOS 26.0.0 or any future version.






5 thoughts on “Fixing Homebrew Issues After macOS Upgrades: A Comprehensive Guide”