How to Do a Reverse OpenCore Legacy Patcher (Uninstall OCLP and Revert Patches)?
OpenCore Legacy Patcher (OCLP) is a powerful tool that enables unsupported Macs to run modern macOS versions like Tahoe or Sequoia by injecting patches and bootloaders. However, if you’re experiencing issues, upgrading hardware, or simply want to return to stock Apple support, reversing OCLP uninstalling the app, removing patches, and restoring the original bootloader is essential. This process, often called “reversing” or uninstalling OCLP, can be straightforward but requires caution to avoid boot failures.
In this guide, tailored for iTech4Mac.net readers, we’ll walk through step-by-step instructions based on the official Dortania documentation. Always back up your data first!
Why Reverse OpenCore Legacy Patcher?
Reversing OCLP might be necessary if:
- Stability Issues: Patches cause crashes or incompatibility with updates.
- Hardware Upgrade: Migrating to a supported Mac (e.g., Apple Silicon) via Migration Assistant transfers OCLP files.
- Stock Restoration: You want to sell the Mac or revert to natively supported macOS (e.g., High Sierra on a 2009 Mac Pro).
- Future-Proofing: Preparing for official Apple support or avoiding maintenance.
Note: Reversing on unsupported macOS installs requires reinstalling a compatible OS, as removing OpenCore may prevent booting.
Prerequisites Before Reversing OCLP
- Backup Everything: Use Time Machine or clone your drive with Carbon Copy Cloner. This is critical, as boot changes can lead to data loss.
- Recovery Media: Create a bootable USB for your target macOS (e.g., via the App Store installer).
- Supported macOS: For Monterey+ (Big Sur needs reinstall).
- Admin Access: Ensure you’re logged in as an admin.
- Internet Connection: For downloading tools if needed.
Step-by-Step Guide to Reverse OpenCore Legacy Patcher
Uninstalling OCLP is a three-part process: reverting root patches, removing OpenCore (bootloader), and deleting the app. Perform them in order for a full reversal. If you’re on Big Sur or earlier, skip root patch reversion and proceed to reinstall.
1. Revert Root Patches (Monterey and Later)
This restores system files modified by OCLP using snapshots.
- Steps:
- Launch the OCLP app from Applications (download the latest from GitHub if missing: dortania.github.io/OpenCore-Legacy-Patcher).
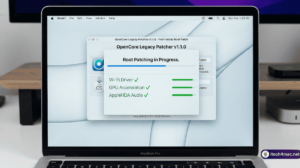
- Go to Post Install Root Patch > Revert Root Patches.
- OCLP will scan and revert changes (may take 10-30 minutes; requires SIP disabled temporarily—OCLP handles this).
- Restart when prompted.
- Why it Works: OCLP uses APFS snapshots to roll back modifications safely.
- Troubleshooting: If it fails, boot into Recovery Mode (Command + R) and run Disk Utility > First Aid on your volume.
2. Remove OpenCore Bootloader
This deletes the EFI folder to stop using the patched bootloader.
- Steps:
- Boot into Recovery Mode: Restart and hold Command + R (Intel) or power button until options appear (Apple Silicon, but OCLP is Intel-only).
- Open Terminal from Utilities menu.
- Mount your EFI partition: diskutil list to identify it (usually disk0s1), then diskutil mount disk0s1.
- In Finder, navigate to the mounted EFI > EFI folder.
- Delete the OC or BOOT folder (the one with OpenCore files).
- Unmount: diskutil unmount disk0s1.
- Restart—your Mac should now use the stock bootloader.
- Caution: If you see a prohibited symbol (⏻), boot from your recovery USB and reinstall macOS.
- Alternative for Native Macs: If not on unsupported OS, reset NVRAM: Restart holding Command + Option + P + R until second chime.
3. Uninstall the OCLP Application
Remove the app and residual files.
- Steps:
- Quit OCLP if running.
- Drag the OCLP app from Applications to Trash.
- Empty Trash.
- For thorough cleanup, open Terminal and run: text
rm -rf ~/Library/Application\ Support/OpenCore-Patcher rm -rf ~/Library/Caches/com.dortania.opencore-legacy-patcher rm -rf ~/Library/Preferences/com.dortania.opencore-legacy-patcher.plist - Restart to clear caches.
- Tool Option: Use AppCleaner or CleanMyMac for automated removal.
4. Reinstall Natively Supported macOS (If Needed)
For full reversal to stock, erase and reinstall a compatible OS.
- Steps:
- Boot from a bootable USB installer for your desired macOS (e.g., High Sierra for older Macs).
- In Disk Utility, erase your main volume (APFS format).
- Install the OS it will use Apple’s stock firmware.
- Restore data from backup.
- Tip: Check Apple’s support site for compatible versions per model.
Common Issues and Troubleshooting
- Prohibited Boot Symbol: Boot from USB installer, erase EFI partition, and reinstall.
- Migration Assistant Transfer: On new Macs, manually delete OCLP files as in Step 3; no bootloader changes needed.
- SIP Errors: OCLP auto-manages SIP; if stuck, boot to Recovery and run csrutil enable.
- Big Sur Specifics: No snapshot support—direct reinstall required.
Comparison: Partial vs. Full Reversal
| Reversal Type | Steps Involved | Time | Best For |
|---|---|---|---|
| Partial (Patches Only) | Revert Root Patches + Uninstall App | 30 min | Keeping OpenCore but fixing issues |
| Full (Bootloader + OS) | All steps + Reinstall | 1-2 hours | Returning to stock completely |
Prevent Future Reversal Hassles
- Document your OCLP version and model settings.
- Keep a stock macOS installer handy.
- Test patches incrementally before full deployment.
finally
Reversing OpenCore Legacy Patcher involves reverting patches, removing the bootloader, and uninstalling the app restoring your Mac to its original state. For unsupported setups, a full OS reinstall is often necessary to boot safely. Follow these steps carefully, and back up religiously. If you’re downgrading from Tahoe, consider our guide on clean installs. Share your reversal experience in the comments! For more legacy Mac tips, visit iTech4Mac.net.
CTA: Check our macOS Tahoe downgrade guide or OCLP installation tutorial or Dual-Boot OCLP.