OCLP Post-Install Checklist: 10 Things to Do After Installing macOS Sequoia on Unsupported Mac
Congratulations – you have installed macOS Sequoia on your unsupported Mac via Open Core Legacy Patcher (OCLP). But the job is not finished. Without post-install root patches and a few key configurations, you may be missing Wi-Fi, GPU acceleration, audio, and more. Here is the complete 10-step checklist.
The 10-Step Post-Install Checklist
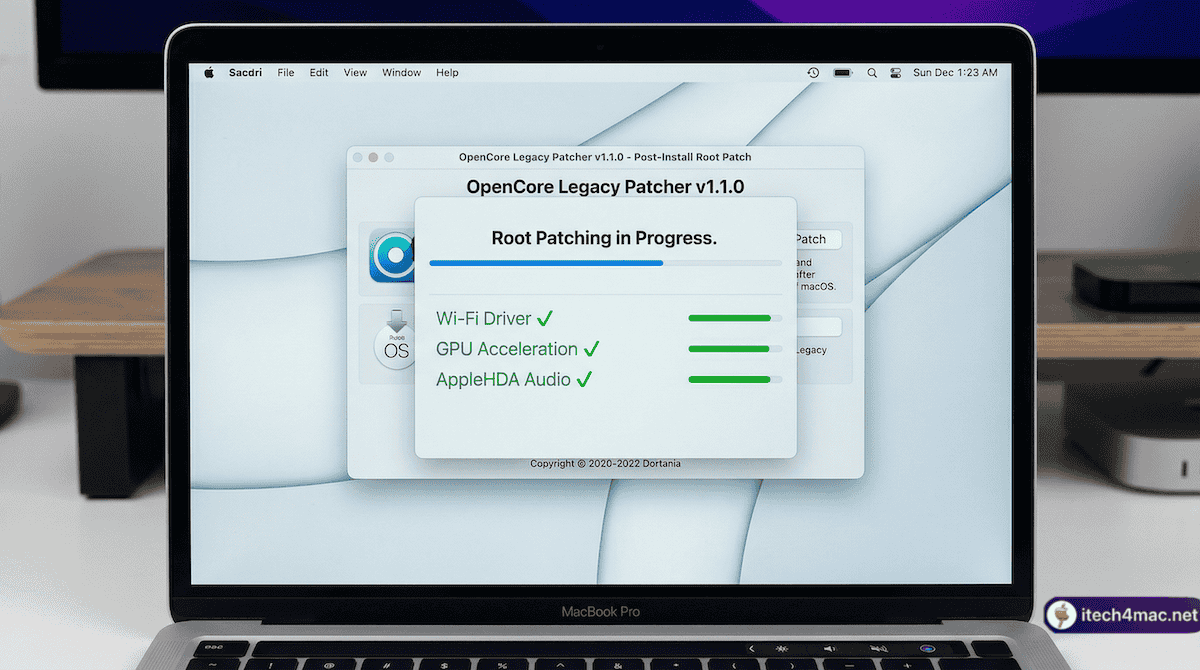
Step 1: Apply Post-Install Root Patches Immediately
This is the most important step. Without root patches, you will likely have no Wi-Fi and possibly no GPU acceleration.
- Open OpenCore Legacy Patcher (download from GitHub if not present)
- Click “Post-Install Root Patch”
- Click “Start Root Patching”
- Reboot when complete
Tip: If OCLP says no patches are needed, your Mac may not require root patching (newer Metal GPUs). Proceed to Step 2.
Step 2: Connect via Ethernet for the First Root Patch
On some older Macs, OCLP needs to download additional packages (MetallibSupportPkg or KDK) from the internet during root patching. If you have a legacy Wi-Fi card, it will not work until after patching — creating a chicken-and-egg situation. Always connect via Ethernet for the first patch run to ensure all packages download correctly.
Step 3: Install OpenCore to Your Internal Drive
If you installed using a USB bootable drive, you are booting OpenCore from the USB every time. Install it to your internal drive for seamless booting:
- Open OCLP → “Build and Install OpenCore”
- Select your internal SSD/HDD
- Reboot and hold Option — select your internal drive EFI
- Set it as the default startup disk in System Settings
Step 4: Verify Wi-Fi Is Working
After root patching, go to System Settings → Wi-Fi and check that your network is visible and connectable. If Wi-Fi is missing from the menu bar, root patches did not fully apply. Re-run root patching with an Ethernet connection.
Step 5: Verify GPU Acceleration
Open Activity Monitor → GPU History (View menu). You should see GPU activity when performing graphical tasks. If GPU History shows zero activity or the window is blank, GPU acceleration is not active — re-run root patches.
Step 6: Test Audio
Go to System Settings → Sound and check that your audio output device appears correctly. Play a test sound. If there is no audio, re-run OCLP root patches — the AppleHDA audio patch may not have applied.
Step 7: Check Your SIP Setting
OCLP sets SIP automatically. To verify: open Terminal and type csrutil status. For most Metal Macs, SIP should report as “enabled” or partially enabled. Do not manually enable full SIP if your Mac requires root patches — this will break your install.
Step 8: Set Up Automatic Root Patch Reminders
OCLP will prompt you to re-apply root patches after macOS updates. Accept this prompt every time an update installs. Never ignore it. You can also enable OCLP auto-updates in its Settings → App section.
Step 9: Create a Time Machine Backup
Now that your system is stable and patched, create a Time Machine backup immediately. This is your safety net for future updates, root patch failures, or unexpected issues.
Step 10: Block the macOS Tahoe Upgrade Prompt
As detailed in our separate guide, block macOS Tahoe upgrade prompts using Terminal or System Settings to prevent accidentally triggering an unsupported upgrade. See our article: OCLP Users: Why You Should Stay on macOS Sequoia.