VMware Workstation/Player is typically used on Windows hosts (not macOS), this guide is for a Windows-based laptop or PC. macOS virtualization on non-Apple hardware requires additional steps (e.g., unlocking VMware), as Apple restricts macOS to its hardware.
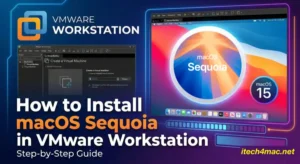
Below is a step-by-step guide tailored for VMware Workstation on a Windows laptop/PC, with notes for adapting to a Mac host if needed.
A video shows the steps to install macOS Ventura on windows PC
Prerequisites
Windows Laptop/PC: Intel or AMD CPU with virtualization support (VT-x or AMD-V enabled in BIOS).
VMware Software: VMware Workstation Pro/Player 17+ (18+ recommended as of April 6, 2025). Download from vmware.com.
macOS Ventura Installer: Either Install macOS Ventura.app (from a Mac) or a Ventura ISO file.
Space: 50GB+ free (SSD recommended).
Unlocker Tool: Required to enable macOS support in VMware on Windows.
Internet: For downloads and setup.
Step-by-Step Guide
Step 1: Enable Virtualization in BIOS
Why: VMware requires CPU virtualization (VT-x/AMD-V).
How:
Restart your laptop/PC.
Enter BIOS (press F2, Del, or your device’s key during boot—check manufacturer docs).
Find Intel VT-x, AMD-V, or Virtualization Technology (under CPU or Advanced settings).
Enable it, save (F10), and reboot.
Verify:
Open Task Manager (Ctrl + Shift + Esc) > Performance tab > CPU. Look for “Virtualization: Enabled.”
Step 2: Install VMware Workstation
Download:
Go to vmware.com/products/workstation-pro.html (Pro) or vmware.com/products/workstation-player.html (Player).
Get version 17+ (free Player or trial Pro).
Install:
Run the .exe installer.
Accept terms, choose defaults, and click Next until finished.
Launch VMware after installation.
Step 3: Download VMware Unlocker
Why: VMware doesn’t natively support macOS on Windows—Unlocker patches it.
How:
Visit github.com/BDisp/AutoUnlocker or github.com/paolo-projects/auto-unlocker.
Download the latest release (e.g., unlocker-master.zip).
Extract to a folder (e.g., C:\Unlocker).
Apply Unlocker:
Close VMware completely.
Right-click win-install.cmd in the extracted folder > Run as Administrator.
Wait for it to patch VMware (downloads ~600MB of tools). Command Prompt will close when done.
Step 4: Obtain macOS Ventura Installer
Method 1: Create ISO from a Mac
On a Mac (any supported version):
Download Install macOS Ventura.app from the App Store (search “Ventura” if available) or use gibMacOS: git clone https://github.com/corpnewt/gibMacOS.git cd gibMacOS python3 gibMacOS.command
Select Ventura (13.x), download, and extract to /Applications.
Run: sudo xattr -r -d com.apple.quarantine /path/to/Ventura.iso (On a Mac, if preparing the ISO there.)
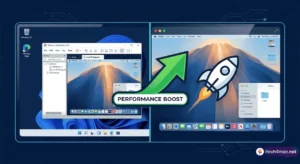
Slow Performance:
Increase RAM/CPU in VM settings. Use an SSD.
Notes
Windows Host: This guide is for VMware Workstation/Player on Windows. For a Mac host (e.g., your old unsupported Mac), use Parallels (as VMware Fusion has stricter macOS version limits on old hardware).
Legality: Apple’s EULA allows macOS VMs only on Apple hardware—running on Windows violates this but is technically possible.
AMD CPUs: May need extra .vmx tweaks (e.g., featureCompat.enable = "TRUE").